Friday, 4 October 2013

Accurate 100yrs war conversions

4 more conversions, two for Hugh Jarse´s marauders and two generic kniggits using bits and pieces from both of Accurate´s 100yrs war sets, the English Men-At-Arms and the Knights Of France
The easy conversions, Basic top half swops;
Legs from bod on the left, Body from the bod on the right
Same as above.
The slightly more complicated conversions;

Body from the bod on the left, arms from the bod on the right
Body from bod on the left, sword arm and shield arm from the two on the left.
Don´t Forget!!!! The Neopolitan challenge is coming on the 7th ...a Redhead, blonde and brunettee fight it out over at Anne´s blog.

Wednesday, 2 October 2013

Ancient Roman Crane

1/72nd scale (what else? :-) ) from Fredericus-rex, purveyors of very fine 1/72nd scale buildings and machinery (war and civil) Direct link to the crane HERE
A nice looking machine although you do Need a bit of modelling skill (and Patience) to put it together.

A couple of Detail pics.

Now to some tips.
1. The thread that Comes with the kit. It´s a wee bit white so needs colouring a bit.   To do this, I put the string in some hot water, added an old teabag and a teaspoon of ground coffee. Leave for a couple of hours and then dry out. One thing,  there isn´t really enough to cover the whole of the "rigging" especially when tying knots, if  you, like me , use up a couple more cm´s than necessary.
2. The thread does tend to "fray" (can be seen in the pics) This can be reduced with a bit of olive oil on finger and thumb, then pull along the thread.
3. The kit doesn´t come with a base. I´ve made one (9 x 13cm´s)  from an old Cigar box.
4. Use Pins instead of the wire provided to build the pulley blocks for the hook. Make the holes slightly larger by pushing the pin through into a cork. This may seem like a bit more work but it saves a lot of fiddling with bendy wire.
5. The arms on the winding gear. Bin them, they are way too thin. I used  0.8 copper wire.
6. The dowels to attach the wheel and the winding gear have a very tight fit, which means they aren#t likely to turn when fitted. This doesn´t make much difference as I found it  best to wind the thread on when they are in thier final positions. Anyway, if they turned, it would take any tension out of the thread and it would hang down.

Attaching the pulleys with a loop  of thread so they hang down. To do this without loosing your temper and basing the thing off the wall do this, use a thin Paintbrush handle. Lay it along the beam and tie the thread around both it and the beam. A Paintbrush is good, it being tapered makes it easier to remove. The same technique for the pulleys on the stakes.
 

"Rigging" the hook pulley System. This is shown in the instructions as being done without attaching the main pulley onto the top of the crane or attaching the hook to the small pulley. I considered this but realised it would be way too fiddly to  do this in the order suggested, so I did it in "reverse" order.
There´s enough space to pin (I didn´t use the wire provided) the pulleys to the Piece of Balsa (provided for the Task).
One Suggestion, tape the Piece of Balsa down to stop it sliding about or use a larger "pinnable " surface like a cork mat.
Also after attaching the thread,  and as it dries, keep it under Tension by again taping it down.

.

Monday, 30 September 2013

Bodstonian Trappers

It´s been a Long time since I´ve done anything for Bodstonia,
Still..they aren´t going anywhere...I hope :-D
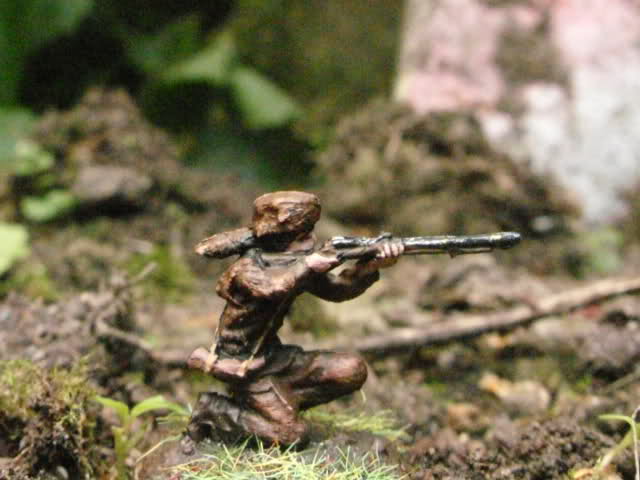
Another couple of additions , some trappers. using bods from the Atlantic Davy Crocket set.
A Little bit of an Info write up HERE 

The one Standing and firing is a conversion, Bottom half from the "3er" Group, top half from the kneeling bod.
The "bayoneting one is from the "3er" Group.


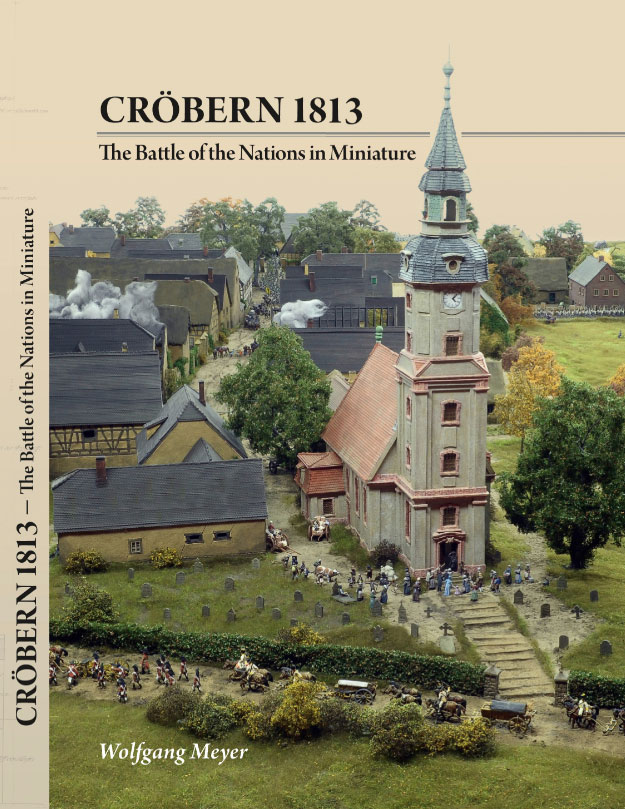
On the 10th of October the cröburn 1813 book becomes available!!!!! Pre-orders  are possible on thier new site History: die Welt in Miniaturen (The world in miniature)
Also available is a  DVD´s covering both Cröbern and Möckern and soon,  other great stuff, like the buildings etc.

And as a reminder, Anne´s  (O´leary´s Miniatures) and Pats (It´s Rhyme Time) giveaway is tomorrow. If it doesn´t Show up on your blog roll, it´s best just to look as Anne´s blog doesn´t seem to update on the blog rolls.

Friday, 27 September 2013

Red Sky in the Morning.

The exact opposite to Robin of the Hood, Sir Hugh Jarse robs the poor to feed the rich and recently has been quite successfull at the Job, meaning he can hire some more motley marauders.
More marauders means more monetary mayhem.............where will it all end?

The whole gang together. Sir Hugh (to the right) mounted on his steed, Nightmare, and Sir R.Sliker (to the left) on his nag Gait Keeper. Between them is thier Sergeant-at-arms, Hugo First.
The two bods in the middle are the original poses, to the left and right, simple head swop conversions
Again, the two bods in the middle are the original poses

Red sky in the morning, peasants warning.  Sir R.Sliker leads a band of marauders accompanied by a Prison wagon.  This doesn´t look good for the good folk of Styrow-on-the Foam!!

And dont Forget Anne´s Double Triple Secret Give Away , being Held over at O´leary Miniatures and concluding on the 1st of October. Anne´s Give away is Kindly supported by Patrick Hatt of It´s Rhyme Time Blog.

Monday, 23 September 2013

Medieval army on the march

A Lord and his retinue on the march. Made up using bods from a variety of sets from mainly Valdemar but also  Zvezda and RedBox,  a few Foot and mounted additions to the baggage Train.
Scouts
Lord and halbardiers
Hired levy

The Coat-of-Arms, Ordinary  Azure Chevron  Argent is made up. Well,  I haven´t found any anyone historical who it belonged to....yet.

For fun, A couple more pics with baggage elements added.

A bit of blog pimping...Anne´s Double Triple Secret Give Away , being Held over at O´leary Miniatures with lots of goodies to be had and supported by Patrick Hatt of It´s Rhyme Time Blog.
One of the minis on offer...as Anne says, Sexy isn't she? And you want her, you know you do


Saturday, 21 September 2013

Dismounted Crusaders (Caeser)

Following the Medieval European Knights 13th Century from Caeser this lot is the Dismounted crusader set.
Like the European set, this lot make usefull bods as members of the armies of the  Anarchy (the war between Stephen of Blois and  Matilda of England ) Magna carter etc  and  like the european Kniggits set,  there is only 11 poses, but this time two  of which are represented only once.
The biggest Problem, and it seems common to virtually all Ceaser sets, is the bent parts, swords, spears etc even bases. One of the  bods in the set was so badly bent backwards  at the ankles he looked like  he was trying to take part in a Limbo contest ! Ok, this can be solved with hot water treatment but it´s still a pain.

All 11 poses
Even though the crosses are very finely engraved I still would prefer none as it Limits the range of uses and covering the crosses is a real pain.
Generic surcoat Patterns
Another magna carter baron,  Rodger Bigod, 2nd Earl of Norfolk. 1144(50) - 1221
Both sets together. They mix really well.

Thursday, 19 September 2013

Medieval European Knights 13th Century

Made by Caeser and a usefull set for crusaders, members of the armies of the  Anarchy (the war between Stephen of Blois and  Matilda of England ) Magna carter,  and and....

36 bods in 11 poses , there´s only one of the pose  holding the  spear
The spear with the flag I´ve replaced. The original was so warped it was easier and faster than trying to straighten it.
All of them I´ve given generic coat´s .of arms, paying no attention to any historically real ones except for the one in the middle which I´ve given the Coat -of-arms of Simon langton, one of the Magna carter Barons...another Project which needs some more attention at some point.
This from the makers of the Spartacus series and  coming next year, Looks fun, Black sails,
Yo Ho me hearties!

Monday, 16 September 2013

Scratchbuilt Cart (How to)

Dead easy, dead cheap.

Tools and bits needed;
Old CD case, set square,  small pliers, hobby knife, sandpaper, some Cocktail sticks, thin Card, needle, some woodglue, plastic glue and paint. (oh,  an some spare wheels)
Cut out the shapes for the wagon. Basically I did this by eye, first the base of the wagon, then the sides and then the end pieces..no measuring, just making sure I got the pieces cut with roughly right angled sides.(apart from the two end pieces ..:-D)
Using the sharp knife and the set square, score lines to represent Planks. Using the needle re-score to make the lines deeper. Sand down and then use the needle to remove and dust that´s got into the grooves (don´t worry if the needle Slips causing Scratching, this dissappears when painted)
Glue the base of the wagon to the thin Card using woodglue. The sanded surface of the plastic bonds really well with the card. Why the card? This makes a good surface to attach the axle and shafts later.
Next stage when the glue has dried, cut away the excess card, and glue the sides onto the base.
To make the struts for the sides, use the pliers to gently "snap" them  off. Best to score the plastic at least three times for very thin pieces.
Next the wheels and shafts. Halfway through the build I decided on using different wheels.
Basically, the toothpicks are cut to length, two for the shafts and one for the axle.The shafts I made by removing one side of the toothpicks to give a flat surface to glue them to the base.
Paint all the parts, and glue on. Just visible on the bottom of the footboard I´ve added a couple of small supports.
Wagon finished! :-D
All in all it took just under an hour to make this one and cost...? Nothing?

Thursday, 12 September 2013

Scottish Baggage train (Bannockburn)

This will represent Sir William de Erth of Airth´s  baggage train at Bannockburn. I won´t even consider creating the english baggage Train as even with them plundering the local countryside for provisions it  must have been massive and would be a Project all of it´s own.
The  wagons used will be either scratch built or the ones in the strelets Transport sets but with considerable Alteration.. The Crews, guards and  the animals pulling them will be from Strelets.
Sets used;
Normans on the March (several of the marching bods)
Strelets Norman Train (Driver and wagon wheels)
Roman Transport  (the ox)
Medieval Levy (2)  (marching bods)
"Shaab" with crusader Crew (one the marching bods)                  

The bods new weapons come from the Zvezda medieval peasants set.
Removable /swoppable load
The wagon is mainly made from old CD case plastic as are the bases.
A group of marching bods.
The new wagon and bods with previous strelets based baggage Train stands. A couple morer Groups of marching bods and some stands with mules/donkeys, should see this finished.
And........the Neoplolitan Painting Challenge is underway.:-D
3 Bloggers, 3 minis, a Blonde vs a Brunette vs a Redhead.
Anne will paint a Blonde, Marzio  will paint a Brunette and I´ll be painting a Redhead.
Final pics and The Vote is on the 7th of Oct over at Anne´s blog.
Here´s mine, primed and ready. (The left hand hasn´t been attached yet)