Friday, 9 September 2011

Chick chick chick...

...chick chicken, lay a little egg for me...altogether now!!!, chick chick chick chick chicken I want one for my tea...so chick chick...."
The hen house scratch built...the straw is the stuff plumbers use for sealing threaded joints.
Hens and cockerel from Pegasus  farm animals set
Hello to  Piotr Nowacki from STRIPtease Comics blog ??? Am I right??

Thursday, 8 September 2011

ART Miniaturen Decurion and calo

Another batch of Roman cavalry from ART Miniaturen, this time Some dismounted Auxillary cav and a Decurion and his calo ( military servant)
n
"Right you lot...over there is...
...and over there is...where did they go???? ."
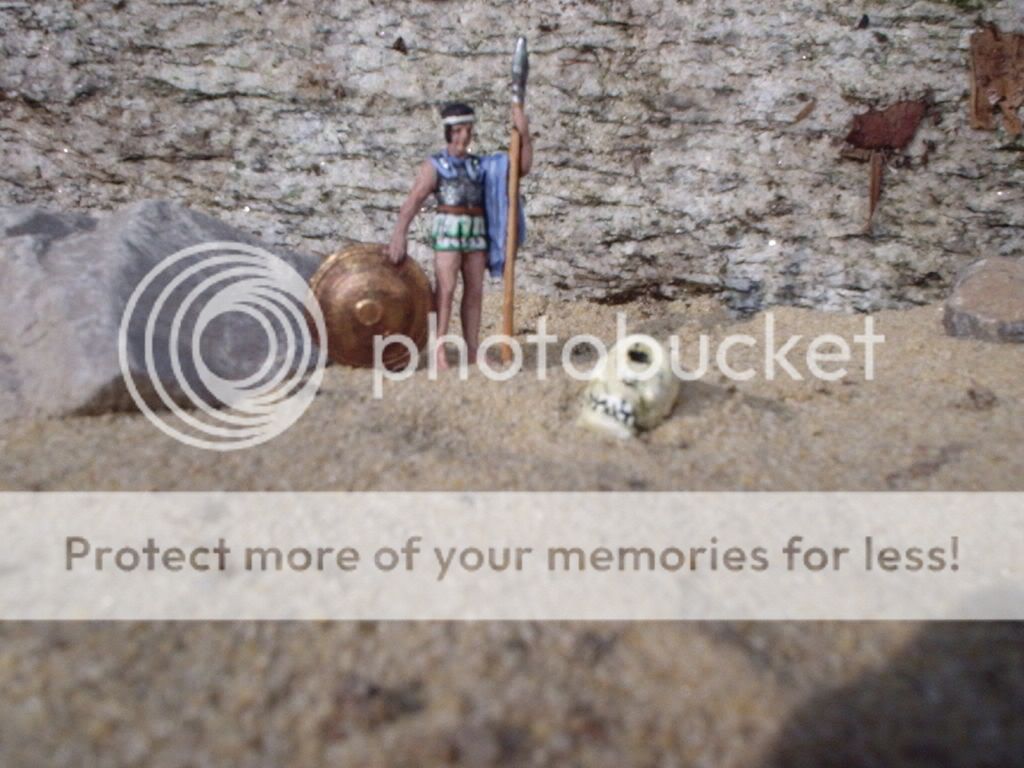
The attention to detail is what makes these worth getting. The saddles for instance..I can´t think of any other manufacturer that has made the 4 horn roman saddles in this scale

Wednesday, 7 September 2011

ART Miniaturen Roman Cavalry

Produced by Jorg Schmaeling and sold at his webshop ART Miniaturen
I´m not a great fan of metal minis in 1/72nd but these I had to have :-D


And some bloody great news...Strelets are bringing out a Roman market set, the potential for some medieval conversions is definately there...and they are going to bring out a Spartacus set!!!!!!!!!!!!!

Tuesday, 6 September 2011

Strelets Batavian cavalry

The full Titel is Batavian cavalry in Roman service but they don´t always have to play the underdog and sometimes they didn´t as can be seen here.
My lot are still loyal and carry a roman standard. The spear was bent anyway so had to replaced.
Hello to Timothy from Fidus et Audax, ( faithfull and courgeous ) which is very fitting to the Batavians (well these lot anyway)
Timothy has just opened his blog...another 1/72nd plastics fan (?) and he´s been luckier than me..he got one of the Caeser adventurer figs I have so far failed to obtain..the female magician and he´s done a grand paintjob on them. .

Monday, 5 September 2011

Zvezda Siege tower

This is one BIG model!!! 20cm´s tall, 9cm´s wide and 11 cm´s deep!!
Tons of brown paint and hours of drybrushing involved.
Fitted easily together...a small gap between the front and side panels (below the drawbridge) but strapping it up with rubberbands as it glued closed it.
Here´s another example of the tower over at Peter´s Cave Blog 
I gave the cow hides one general colour and used a bit of middle gloss to give them a wet look  (they used to tip water over them to stop fires being started on the bare wood by the defender)
One of the good things about this kit is the working draw bridge. The fit is tight enough so that when the bridge is hoisted up it stays put.
The woodwork on the kit is very neatly done ..which doesn´t really look quite right somehow...a bit like it was made using power tools, so I hacked the planks up like here on the drawbridge......
....and here on the tower. 

Sunday, 4 September 2011

Medieval Tent (How to)

Not the best template that´s ever been made but it´s the best I can do :-D
It´s drawn on A4 and the tent it will make is 5cm´s Tall and 5.5cm´s wide.
Forgive my c**p handwriting :-D

The scale of the tent can be altered by simply extending the dotted lines to the centre point and using a compass to re-create the top and bottom of the "canvas". The same with the roof.
For the long sided tent you´ll need to add another side (where the dotted lines are on the roof part) and adding the half circle for the roof on the other end.(it wouldn´t all fit on the plan I have made) For the walls, you´ll need two pieces, using the number 4 side as a tab.
I´ve tested this template to see if it fits and it does...the bottom tent is made using it. 
Here´s how I make them with the ropes.
Cut out the shape. I´ve got one  made using thick card which I use as a template but this is thin card from a folder divider. Score along all lines to aid folding.
Paint
Glue together and glue to the base. I´m using an old CD with paper stuck to the bottom. The tent pegs are old paperclips cut to length, then warmed over a candle and welded into position. (to hold the pieces use pliers!!!!)
Tie thread from one opposing corner to the other. This can be a bit fiddly and I use tweezers to loop the knots. If you do it well, the ropes won´t need glueing.
Add roof, flock or whatever...finished :-D

Saturday, 3 September 2011

Jason was Here

That sinking feeling you get as a hero setting out on your career, only to find that someone has already defeated the best of the mythical beasts.and your efforts are worthless.

Friday, 2 September 2011

The Dog Legion

Following a resounding victory in the Teutoburger Forest, the Roman Empire expanded at a rapid pace, taking into it´s borders the whole of russia and the far east.
Now some 3000 yrs later the world has fallen into a terrible civil war that has lasted some 70 yrs and poisoned great swathes of the planet in poisonous gases.
Here we see a member of the elite Legio Canus IX. After the successful 4 year long battle of Newyork, the Legio Canus IX was recalled to retake Paris and the surrounding flood plains.
Motto of the Legio canus IX "come back carrying your body bag or wearing it!!"
The trooper wears the type 65 GT helmet, Mk 47 gladius, Kevlar shoulder pads and greaves.
 Ration packs supplied by Burger U..I´m eating!!, Oxygen tanks by Pro-pain inc. Uniform By Gangreen Chemicals Corp

Thursday, 1 September 2011

Pegasus farm Animals

So, all together now..2..3..4..Old mcDonald had a farm, ee eye eee eye oh... and on his farm he had some.........
GOATS....
 ...Some PIGS ...
 ....Some COWS....
 ....and some SHEEP..
....ee eye eee eye OH
...but I haven´t painted the chickens and geese yet,  so no, "with a quack quack there" 

Wednesday, 31 August 2011

Old "converts"

So, it´s the end of the month and for me, the end of one year of blogging, well, this is post number 365  :-D
I´ve reached my target..a Post everyday, and then most of them Hobby related.
Virtually everything I have posted is from the last year or so or is actual...ie; Just painted, made or whatever.
I´ve seen a lot of other peoples work and learnt a lot,  made contact with some great people  and!!...It´s been great fun!!!!! :-D

This little lot are from the begginings of my obsession, some 35+ years ago...In the days when there were few manufacturers and you had to make do, always wishing that Airfix would bring out the 1/32nd stuff in HO..or the other way around....oh what Joy!! :-D
I´m not sure anymore what regiments these lot are supposed to represent!!
Wagons roll!!
In those days it wasn´t a matter of accuracy..it was the having the "different pose" that counted.

A testimony to the holding power of Humbrol gloss paint...

Add a drawing pin and the bod on the left gets a shield  
As can be seen, I liked bods with MP´s. The one in the middle has had his MP40 replaced with a Panzerfaust (a pin)
Hello to Andy from Modest miniatures. Very nice VBCW in 28mm and as Andy says;
However unfortunately I never seem to actually get to game; I just spend hundreds of hours modelling and painting, occasionally producing the odd bit of scenery and a scary amount of time making endless army lists for devastating forces that shall never see the light beyond the end of the miniature display cases.
I Know what he means :-D

Tuesday, 30 August 2011

Emhar Vikings (conversions)

After getting back from hols in the UK a couple more conversions from the Emhar/Imex hard plastic Vikings.
During my visit I finally found an excellent modelshop, one which reminded me of the sort of model shops from my younger days...the Hereford Model centre. If anyone lives in the area and hasn´t heard of it, it´s well worth a visit..Great range of models and kits and helpfull friendly staff.


The whole gang so far

Monday, 29 August 2011

Saxon Houses (how to)

A little article on how I made the saxon houses

Tools needed...some green insulating foam, Matchsticks, some thin woodsheeting (an old drawer bottom) sharp blade, scissors, woodglue, Bailingstring, pins and paint.
Cut the foam into a triangle, cut the doorway out
Cut matchsticks to size and glue into the doorway as the door frame. Make sure they stick out a couple of millimeters above the foam.
The "planks" are made from the bottom of an old drawer, the type that is made up of layers of thin wood. Leave it oustside for a week or so in the rain...then lay it in sunlight...it starts peeling apart, so no unecessary work manually parting each layer. ;-D
Paint the front of the foam triangles dark brown, and glue the "planks" on
When dried, simply trim the "planking" with a good pair of scissors.
Glue the sides on and paint them brown, glue the whole structure to the base. It´s best to paint the inside area of base which the hut covers with dark brown...it´s easier now thantrying to paint through the doorway later
Using thing pieces odf wood glue the above structure on.
When all is dry, cut off finger width sections of bailing string, dab one end in some wood glue and attach using a toothpick or whatever to spread the "sraw" evenly, occasionaly pressing the "straw" into the glue.
Keep going, layer for layer until the above effect is achieved. When it´s all dry, snip the straggly bits of straw off....bit of base decoration...finished!!