This is how I created the
Roman Town, Nothing fancy or complicated, as you will see :-D
The following building took about 3/4 of an hour (taking out drying times for glue and paint)
Taking a bit more care..it would probably have taken an hour, but this made was for the article and will be re-used for a medieval house later.
How you build them is only limited by your imagination. The bigger and more complicated they are, they will obviously need a bit more planning, but after a couple of buildings, it becomes second nature.
 |
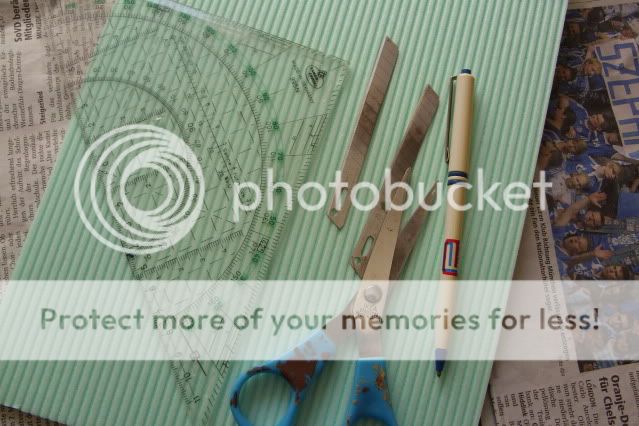
| The tools and materials. Scissors, Biro, sharp blade, setsquare, wood glue and pins (both not in pic) and some polystyrene 4mm floor insulating sheets |
 |
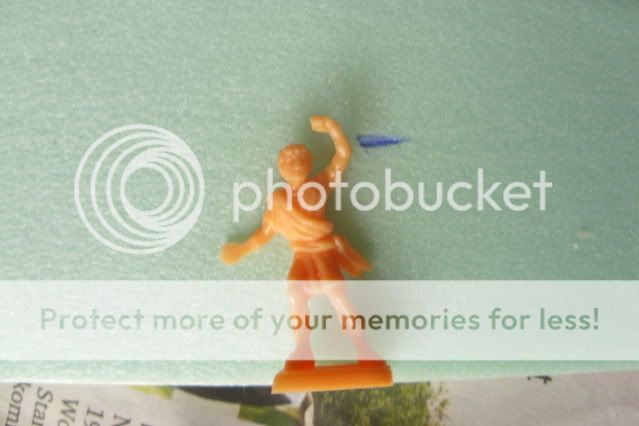
| Decide how long, wide and tall (single, two storey etc) the building will be. When you´ve cut the walls, use a bod to mark where the top of the doors will come. (obviously the bod can be any scale) I always mark a bit lower than the head due to "cutting creep" ie;, the cut out doors always seem to end up bigger than marked. Take care to make sure that the pre-scored lines on the insulating sheet run horizontally along any long lenths of wall/roof to help give them strength. | | . |
 |
| Cut out the doors. This one will be a shop with a house attached. The doors have already got a bit bigger than intended.. |
 |
| The Gable ends can now be cut using the set square. |
 |
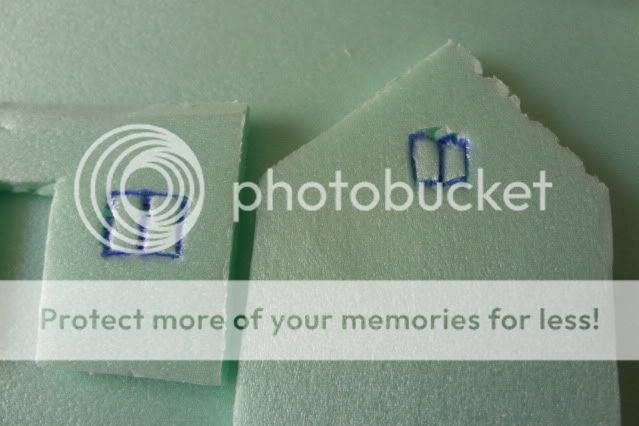
| Add windows where you want them. These don´t have to be marked as here, you can cut the holes out and add windows, but after doing this a couple of times, I gave up in favour of the easy way. |
 |
| Add glue along any touching sides and fit the walls together, using pins to hold the pieces in place as you go. Maximus is measuring up for the wallpare |
 |
| On all my buildings I add a central wall to support the roof. This should have the top end cut to the same angle as the gable walls. Here, on the right of the building, you can see I have added a dividing wall between the shop and house. |
 |
| Measure up the roof plates. Make sure that they are about 1/2 a cm wider all around the bottom and sides of the building, don´t cut them flush with the walls. Cut top and bottom of the roof tile as shown. This is to make the join along the top of the roof easier, and the bottom to make it seem more like thin tiles. |
 |
| Using the biro, simply score the tile pattern on the lined side of the insulation tile, making sure that you make cut a bit through on the sides and bottom to create an overhanging tile effect. Try to pu both roof tiles back to back and make the first markings the same on each side, it looks a bit more like a capping tile when stuck together. After all the vertical markings have been made, run the biro along the horizontal lines to give definition. |
 |
| Paint. It will probably take two coats to get the walls white. The roof I painted with red and brown(50/50), then drybrushed with red. I painted the house and roof seperately (it´s easier) Don´t forget to paint the sides and underside of the roof where it overhangs. The windows I do with felt pens...:-D |
|
 |
| This house was made at the same time by my 6 yr old daughter (pins are still in to hold the roof on) so if she can make one....;-D |
Hello to
Staz. Thanks for following. :-D


Greeeeeat. Now if I try to make it, I am going to come up short of the 6 year olds quality of workmanship... ;)
ReplyDeleteVery cool Paul. A good simple and fast way to make buildings. I like how it makes the task of creating tile roof fast and easy. another good "how to" article.
ReplyDeleteCheers
Will
Very nice tutorial!
ReplyDeleteChristopher
My 6 year old girl loves craftwork and this looks like I have found her the ideal craft project that she can do for daddy!!!
ReplyDeleteNice tutorial you make it looks so easy :)
ReplyDeletethanks for the tips, i will definitely barrow this idea.
ReplyDeleteNever seen any polystyrene like that, I can see a few uses for it. Good tut, thanks.
ReplyDeleteNeat tutorial!
ReplyDeleteBTW, hello to you too.
Good post, I love show and tell.
ReplyDeleteThanks for the tutorial Paul! :-)
ReplyDeleteMight prove very helpful!
T.
Nice Paul! My 6 year old son saw this one and now he wants to have this house, too. He likes it!
ReplyDeletePaul....Another great work !!! Many thanks for tutorial my friend !!!
ReplyDeleteGreat stuff I'm a huge fan of your work. So much so I've moved into the plastic sphere far more forgiving and satisfying.
ReplyDeleteVery nice tutorial Paul!
ReplyDeleteI recognize the bod! He lost his wife and child, and his mother in law :-D
Greetings
Peter
That was a great tutorial, Paul, thank you very much for sharing! :-D
ReplyDelete