The reason I haven´t posted in the last couple of weeks. I read somewhere that this kit requires 70 plus hours to complete….I reckon that´s About right.
Ok, it´s not medieval but why not ? *
The kit Comes with "pre-waved" stickyback Flags which are slightly shiny so I created my own printed versions and replaced one (
Christopher Hatton´s Coat-of-Arms) with the Tudor Rose.
The kit doesn´t give the choice of a full hull or waterline version, just full hull so some surgeory was needed to create a waterline one.
Also...I went for a
"we´re just larking about on the water" look with the lower gun ports closed...apart from one slightly open but without the gun Barrel protruding.
The decking. Badly warped I think. Hot water Treatment solved this Little problem.
The rigging. No blocks are supplied with the kit. It comes with a "rigging Frame" for creating the Shrouds and ratlines and two lots of white thread. White? Well that had to be sorted and blocks aquired. Luckily I have a lot of blocks etc from various "wrecks" that, due to missing a load of thier bits, will never be completed.
The Colour of the rigging? Black? Brown?
HERE is an interesting discussion concerning tarred, therefore darker coloured, or not tarred ratlines. I re-wrapped the threads onto short sticks and dumped them in a bowl of warm water with a teabag and a spoon of coffee powder. The black rigging was made with bought thread.
The Crew.
From
RedBox 16th-17th Cent Spanish and English sailors.
...and
Airfix
The Guns.
Generic red coloured carriages, black iron barrels and Fittings (they look shinier in the pic than in real life)
They got a wee bit of an upgrade. Barrels bored out, Scratchmade Breeching ringbolts added and handles added to the quoins.
I could have gone well over the top with them by adding Train tackle and gun tackle loops but that meant adding 5 more smaller rings to each gun so I went for the Basics and did 16th-17th Cent guns have all the bells and whistles anyway?
The hot water Treatment more or less worked on the deck but s the hull and deck still needed holding together with rubberbands, hairbands and masking tape. Some joins needed extra glueing with second glue.
Waterline Version. How to cut the hull so it sits more or less flat?
Drawing a line? Tape? Guessing?
After a bit of thought...get a bucket of paint and literally float the hull in it.
I attached wires to the fore and aft railings, pushed the hull into some White wall paint, lifted it out and using the wire, hung it out to dry before cutting of the hull below the "waterline"
Holes drilled for attaching thread for opening of the gun ports and work started on adding some detail to the railings.
The deck on the prow. I removed the excess plastic and the hinges got replaced on the rudder as they looked too thin and weren´t offset enough as a pintle type hinge would look.
Woody bits painting pre Details
Stern and bulkheads paintjob
Extra Detail being added to bulk out the railings etc. They were made using an old plastic Advertising placard and each piece had to be cut to length and width before glueing in place.
I swore at myself for even thinking of doing this as it was extremely fiddly and took ages.
Hull painted. I didn´t go for a full Colour scheme. Any more than what I´ve done would take too long and, IMHO, any more would look gaudy. Less is sometimes more ?
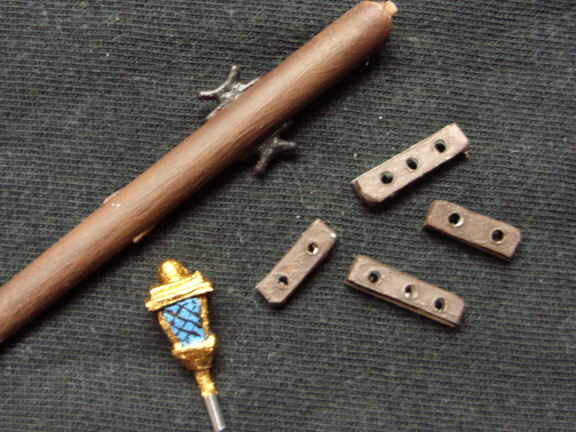
Big fancy Stern lantern made from bits of sprue, pin rails for belaying Pins, and cleats (left over from one of the Cogs) added to the Bow Sprit
Mast painting finished, pulleys for the shrouds, pin rails and lantern added.
The kit comes with a rigging frame for creating the shrouds/ratlines but I decided to go for adding them "in situ" so tiny holes had to be drilled in all the dead eyes, even the tinsy winsy ones.
Guns roped and stowed. Ropes added to the gun hatches
The kit Comes with 4 anchors but one of them was so badly broken it was irrepairable so, seeing as some examples online show only two anchors, two it is. Thread was also added to the Anchor stocks (wooden crossbar bit)
As to wether the anchor is positioned exactly as it would have been. Having the flukes (metal hook bit) any further back or forward on the shrouds would have meant the pulley wouldn´t have hung freely so it is were it is.
Masts added, work on the Shrouds/ratlines started, some rigging added.
Scratch made swivel guns. The one on the right was made using the Barrel of a gun from the Risk Game, the one on the left from a toothpick, strips of paper and the handle for the chamber a bit of copperwire.
Sails painted and roped up. Blocks etc added as far as I could determine where they would be needed. It took 6 Hours of work to get that lot done and a further 6 to add them and the rest of the rigging, which was a combination of various examples so in reality probably wouldn´t work at all.
Tip. As the sails are thin vac-formed it´s wise to add a thread around the edges of them. This prevents any tearing when drilling holes and when adding thread to hold them to the spars etc. Use second glue to do this as due to them being thin, using plastic cement could dissolve them.
Final rigging of the shrouds..adding the ratlines. Drop of second glue on the left shroud, drop on the Right and add a length of thin thread, hold tight for a second or two. When all ratlines have been added, the bits inbetween get a dab of PVA to secure the ratline to the shroud and a bit dabbed on top of the second glue to ensure a secure attachment.
When all dry, cut to length and paint over where the ratline crosses the shroud.
The piece of paper made it easier to see the shrouds.
I cut groove in the sides of the boxlid as a rest so the ship could sit at an angle making work easier.
Was it fun to make?
TBH, it was more a challenge to complete than fun.
The fit of the hull and the deck was difficult, the bulkheads and the walkway on the Stern don´t fit 100% flush but that´s probably down to my ignoring the sequence suggested in the instructions but, if I had followed them, it would have been more difficult to paint the various parts.
There´s no proper rigging plan or blocks etc and rigging it was a test of Patience.
No choice of a full or a waterline Version.
My additional "up-grades" didn´t help with making the build any easier but I don´t think I could just have gone ahead and not added them.
*I refer any historical innacuracies to the Management.


